BuildYourCNC
E-Stop (Emergency Stop) Button - 120v-10A/240v-6A
E-Stop (Emergency Stop) Button - 120v-10A/240v-6A
Couldn't load pickup availability
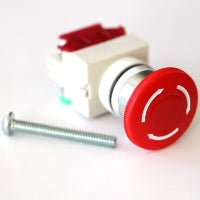
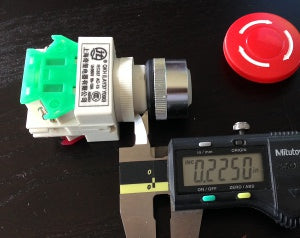
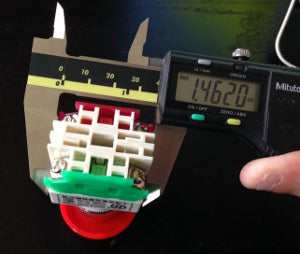
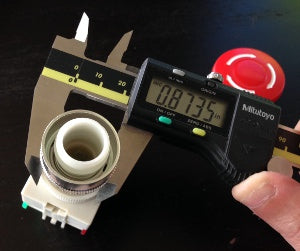
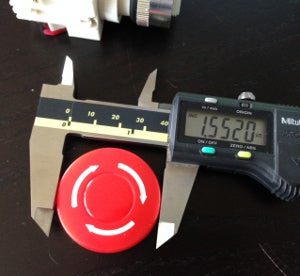
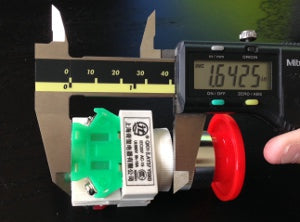
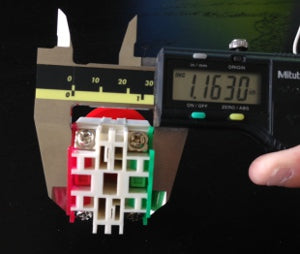
If your CNC Machine starts to run wild, or decides to destroy itself, this button could save your machine, and your nerves! This button is capable of NC (Normally Closed - red side) and NO (Normally Open - green side) operation (notice the red and green on the bottom of the button). Push the button in to engage, and twist to release. Body Dimensions: 2 3/4" X 2" X 1 1/8"
Share
Instructions


Questions & Answers
Have a Question?
-
Do you have any tutorial about conecting emergency stop buttom?
We currently do not have a tutorial on setting up the emergency e-stop button, however it works very similar to a limit switch. (limit switch tutorial: https://buildyourcnc.com/PrimeronHomingandLimitSwitches.aspx) There is 2 sides to the e-stop, first being green NO-Normally Open and secondly being red NC-Normally Closed. From these two sides you will have too choose in which manner you would like to wired the e-stop. If you plan on smashing the button when there is a problem, (as we all do :D) we would recommend wiring it in normally open - Green side. The wiring is simple, you will only need 2 wires going from GND to the input pin, the orientation of the wires is not as important with these switches. Setup Mach 3: You will go to config/ports&pins/inputsignals, there will be one item in that tab enable, e-stop, you will then enter the pin number and you are done. Planet-CNC:(with our board) there is not designated pin which we would recommend wiring it directly to the power cord going to your CNC electronic power supply. Wire it in normally open and to the live/load wire. 3rd party board compatible with planet-cnc or a direct planet-cnc board, go to file/settings/general, there you will choose the output pin for your e-stop as stated on the board schematic. "On a personal note: I have ran into 1 issue once being that they placed the colored covers on the opposite sides, which means that green is red, and red is green. I only ran into this once but I would rather share this info. as a possiblity."
-
Is Artsoft is out of Bussiness ? I am looking fo 64bit software , was going to use Mach4, so what would you recomend ? thanks John
Artsoft (Also called Newfangled Solutions, Inc.) creates Mach3 and Mach3 along with other CNC related software. They are still in business. I noticed that the https seems to not work, so their SSL may have lapsed (2/19/2019). It is safe to use their website; however, if you do purchase on their site while their SSL is down, it's best to use their PayPal link to do the transaction. Additional Information: Or you can purchase the software from us. Additional Information: I would recommend Mach4 for the control software.
-
I have a 64 bit operating system and the Mach3 usb control board. What do i need to communicate between the two?
You will need a USB cable to connect the computer and the Mach3 USB. The 64-bit operating system must be Windows and you will need the Mach3 CNC control software installed on the operating system. You will need to install the USB driver called RNRMotion.dll. You can find the driver here: https://www.buildyourcnc.com/item/electronicsAndMotors-electronic-component-breakout-Mach3-USB-Board Move the file to your Mach3 Plugins folder Example: "C:/Users/ProgramFiles/Mach3/Plugins" Mach3 will prompt you to select a driver and this is where you can select the "RnRMotionController" and check "Don't ask me again". This will allow your board to communicate with Mach3. You will also need the xml file found on this page: https://www.buildyourcnc.com/item/electronicsAndMotors-electronic-component-breakout-Mach3-USB-Board On that page, you will need to download the XML Mach3 Config File by right clicking on the link and selecting "save as". Save the Mach3Mill.xml file in your Mach3 root folder. That file is the main configuration file for the Mach3 board. It has all of the typical settings that the Mach3 board needs.
-
How should I connect the E-stop to the machine?
I would recommend wiring the E-Stop to an input terminal via an NC connection. This is the industry standard. It requires a NC (Normally connected) circuit for the machine to be operational, and when the circuit breaks, the machine shuts off. This is better than having a circuit NO (normally open), open circuit that requires a circuit to be created to have the machine shut off for safety. Having en E-Stop run through the mains line would only work for a single circuit (or use multiple E-stops, which defeats the purpose). The E-stop connected to the input terminal would shut off all machine functions.
-
How do I wire up multiple E-stop to breakout board, does each E-stop need there own pin? If not since there are only 4 screws on stop 2 for no and 2 for nc do you just splice the wires together if your only using 1 pin? Thanks
https://buildyourcnc.com/Item/electronicsAndMotors-electronic-component-e-stop-button-switch-safety#prettyPhoto/0/
-
Hello, Patrick. There is a 22mm hole cut into the plexi display to the left of the lcd on the vlxl. Did you intend that for an indicator light or potentiometer?
I�m not at the office to check, but that sounds like the hole for the emergency stop push button.


